Hello everybody! I want to show You how to handle hair collisions using Blender Soft Body Simulator. This article is separated into 3 parts: Problem, My Solution(Short), My Solution(Extended). You can find .blend files in the article. Excuse me for my English, if I have made grammatical errors.
Problem
In Blender 2.50 it had become impossible to handle hair collisions with mesh using Hair Simulation (Dynamics). That's why it has become hard to simulate long hair. Still there is a possibility to convert (see problem 1) Hair Particle System to Mesh Object (consists of vertices and edges). This Mesh Object (let's call it Mesh) we can simulate as Soft Body, having set Goal Stiffness of Hair Roots to 0.999. It takes more time to simulate Soft Body, than Hair, but it is possible to handle collisions with surface. If we follow this way, two problems appear:
1) There is a bug, when I try to convert Hair with applied Hair-style (particle edit in 3DView). It is possible sometimes.
2) Strand settings of material can not be applied to Mesh with full functionality (f. e. checkbox "Use blender Units" doesn't work: in rendered image hair have thickness 1 pixel).
First problem I can't solve. I want to offer a solution of the second problem and to give an example how to simulate collisions.
My Solution(Short)
To simulate Hair Collisions and to get renderable result I want follow that way
1) Apply Hair Particle System to object
2) Convert Hair Particle System to Mesh (consists of vertices and edges)
3) Add vertices, that are roots, to vertex group ROOTS
4) Apply Soft Body Simulator to Mesh
(Next steps are needed to render Mesh)
5) Run my python script to create mesh Tubes
6) Export simulated animation of Mesh to file animation.mdd, using modified Python addon Import-Export: NexTek MDD format
7) Apply this saved animation to mesh Tubes
8) Render
My Solution(Extended)
Here I will show You what I do step by step.
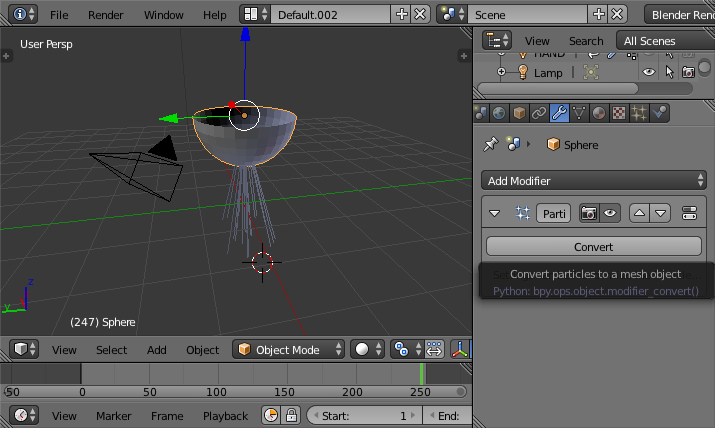
1) Apply Hair Particle System to object
Add mesh Sphere. Leave only top vertices. In Panel Properties in Tab Particle Systems add new Particle System. Set it's type to Hair. In Display Tab change Number Of Subdivisions to 4 (2^4 = 16 edges per Hair).

2) Convert Hair Particle System to Mesh (consists of vertices and edges)
Move to tab Modifiers. Click Convert. (You need to turn Object Mode In 3DView )
Select new object Mesh and turn to Edit Mode.
3) Add vertices, that are roots, to vertex group ROOTS
Root vertices are selected. Add them to new vertex group ROOT.
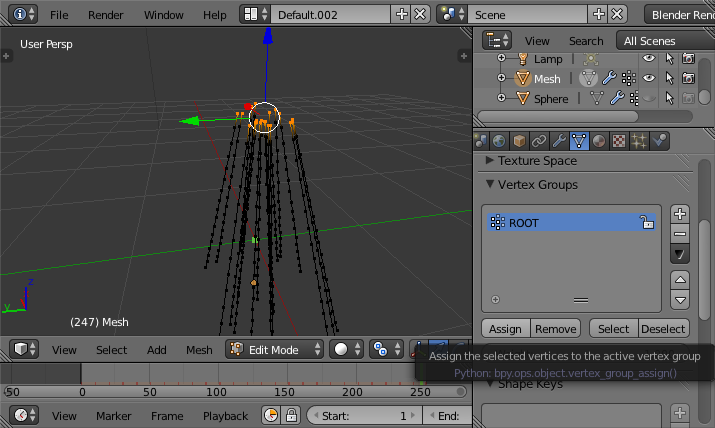
Press Ctrl + Num_Plus to select neighbour vertices and add them to new vertex group ROOTS.

4) Apply Soft Body Simulator to Mesh
In Panel Properties go to tab Physics. Enable Soft Body. Set next parameters:
Friction: 0.000
Mass: 0.012 (hairs have little mass)
Simulation Speed: 1.000
Goal Strengths:
Default: 0.000 (If 0.000, hairs would be free from it's first position)
Minimum: 0.000
Maximum: 1.000
Goal Settings:
Stiffness: 0.999 (just enter 1)
Damping: 0.000
Vertex Group: ROOTS
Enable Soft Body Edges
Pull 0.050 (if edges off better 0.5, see below)
Push0.050 (if edges off better 0.5, see below)
Bending Stiffnes: 2.000
Air: 120
Enable Edge Collision If on, will greatly reduce performance, but solve more accurate when on convex surface. There are 2 variants: to enable this options, but not to use many ( more than 10) edges per hair, or to disable this, but to use about 20 or more edges per hair (Change Bending Stiffness).
Add mesh HAND (my or Your own) and enable Collision.
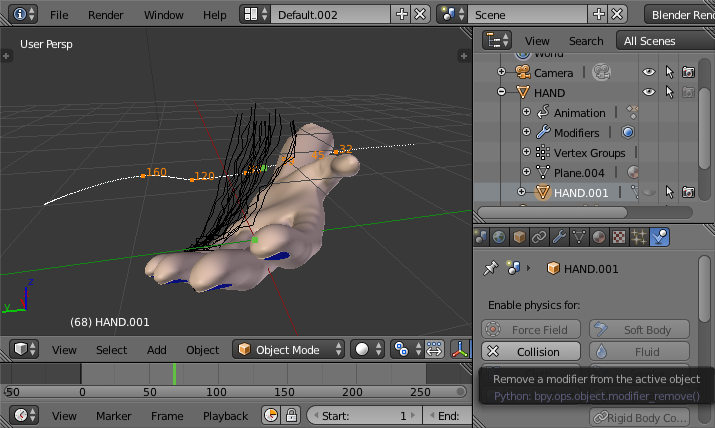
Apply animation for this object. Bake Cash for Mesh.
Before I jump to the next step, You can download staging file file_003.blend
(Next steps are needed to render Mesh)
5) Run my python script to create mesh Tubes
Download hs_sb_gen_mesh.012.py. Open text editor in Blender and open this script (Text -> Open Block). This script will add a Button "Add SB_HS_Mesh" to 3DView Add -> Mesh. Run this script
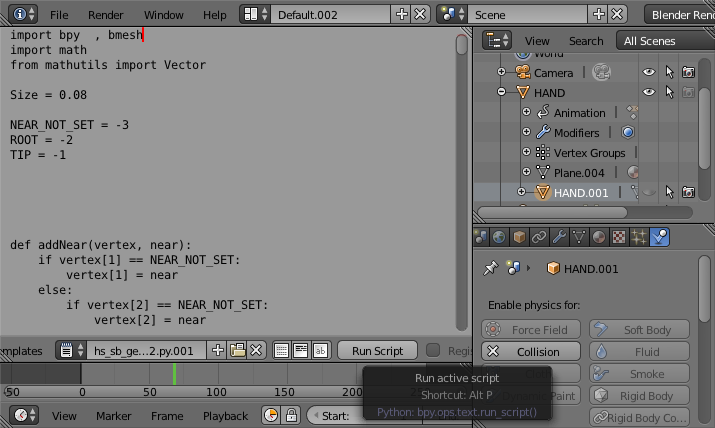
Select object Mesh. In 3DView select Add -> Mesh -> Add SB_HS_Mesh.
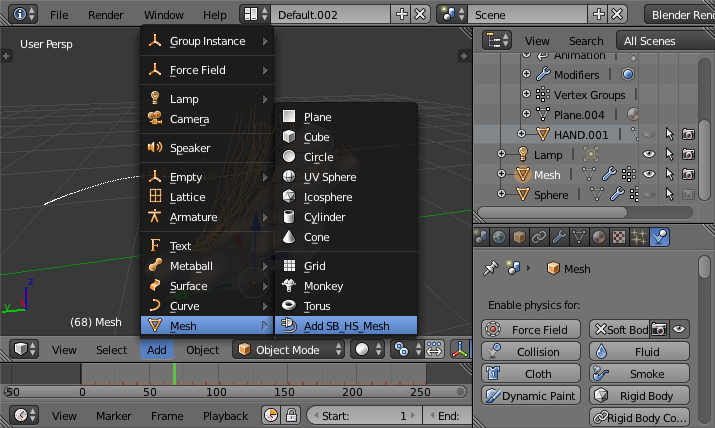
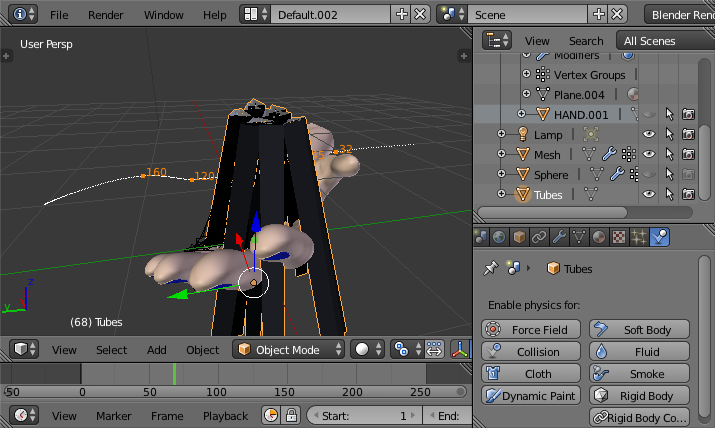
A new object Untitled will appear. Rename it to Tubes. If Your object is empty, be shure, You have Vertex Group ROOTS.
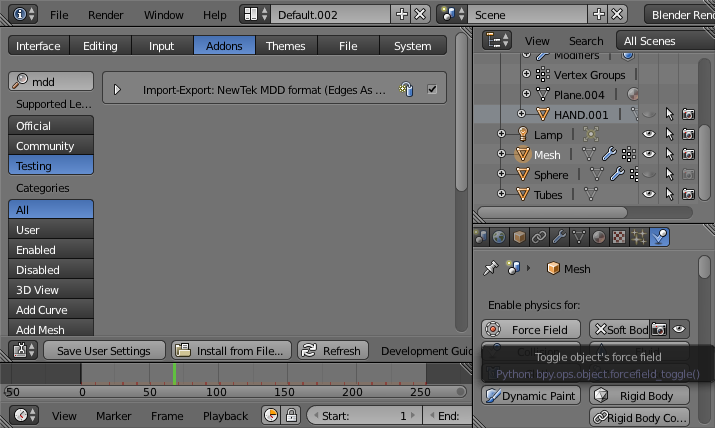
6) Export simulated animation of Mesh to file animation.mdd, using modified Python addon Import-Export: NexTek MDD format (Edges As Tubes)
Now Quit Blender (don't forget to save work!). Download io_shapes2_mdd.rar. It contains folder io_shapes2_mdd. Put this folder in Blender\2.70\scripts\addons near io_shapes_mdd. This addon is modified addon io_shapes_mdd. Run Blender. Now select Mesh. Enable Addon. Note, it has cathegory "TESTING".
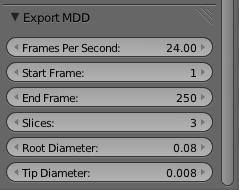
Select File -> Export -> Lightwave Point Cache (Edges As Tubes) (.mdd)

Export animation to file animation.mdd. You can adjust some parameters. Performance will print in console ( Window -> Toggle System Console ).
7) Apply this saved animation to mesh Tubes
Select mesh Tubes and apply to it Modifier Mesh Cache.
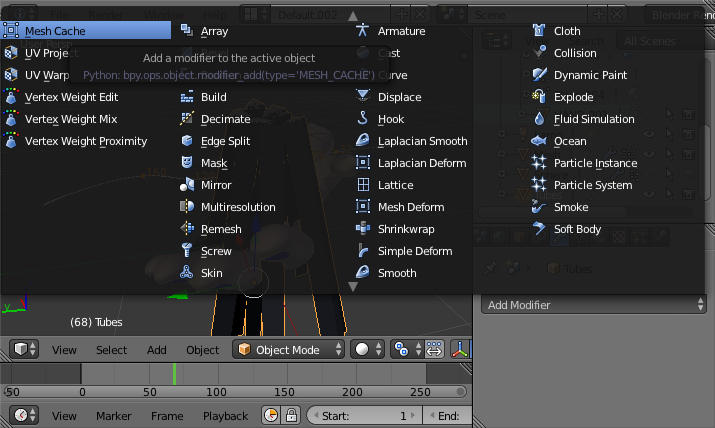
Select mesh Tubes and apply to it Modifier "Mesh Cache". Change File Path to "//HAIR_ANIMATION.mdd". Exporter is responsive to object location, that's why make sure object Tubes is in Zero Point.

8) Render
After this steps were made, we can render our Hair Animation!
Here is final file final_animation.blend.rar and animation HAIR_ANIMATION.mdd .